I'd like to introduce the recently launched, "Batch Find and Replace" feature, for Neptune Web Edit CMS.
This feature was designed to:
1. Make changes to a large number of static files by performing repeated "Find and Replace" matches within the CMS.
2. Quickly scan files throughout the CMS using a keyword string or file-path match. This allows an initial set of files or "batch" to be created, which could later be used for subsequent matches.
3. Add more search/replace matches until all files in the "match criteria" are matched.
4. Use regular expressions, reverse file, back reference interpolation. Read our article on the command line html search and replace tool for an explanation of these options.
5. Preview possible matched differences until the last minute before actual changes are made.
6. If changes were made, the ability to roll back the changes.
Start by Finding Files for a "Batch"
The Batch Replace feature is found under the "TOOLS" link in the top frame. Next, click "Site Search/Batch Find and Replace".
This initial search screen is where you perform a "scan" of all files for the text you want. You can also choose ".html" or ".asp" to identify the types of files you want to include in the batch. "Files, Directories and Extensions" allow you to include or exclude folders such as "/includes/" or ".cfm" or pages which contain the text "/oldfile/badlink.html" in them (the latter example is for fixing broken links or renaming pages or folders).
Please note that "Include" and "Exclude" are based on substring pattern matches against both file name and folder name. Keywords are also a direct substring of the source code of the documents - this is not a keyword search like "Google", for example. It's behavior is more like the UNIX utility, "grep".
Multiple lines can be entered in both "Include" and "Exclude" boxes.
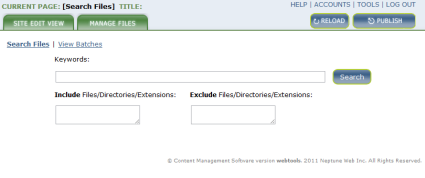
Once you have the files you want to match, enter a title and click "create batch". This will create the batch and save the filenames with the batch. Since this is an initial scan, you will be able to remove individual files from the batch later on.
Backup and Checking File Consistency
Now that you have a "batch", your next step should be to backup and check the consistency of the files. Both steps are optional. We recommended you do both.
Backing up is simple. Just click "Backup Files" and a zip file will be generated containing all files in the batch.
The consistency check goes through all files in the batch, and reports on any problems which might occur when saving the files. You'll want to make sure that the replacement works on all files, so that you don't have errors saving some files in a very large batch. This can be difficult to sort out afterwards.
Why would the files not be consistent? The most common reason is that files have already been modified within the CMS, and could be overwritten by the batch replace. This could be because you weren't aware some other person was working on the site. If the changes were made by another user, you might have to notify them that you are planning to make changes to their pages. If you are sure the person is finished making changes, click "Publish", check the files reported with problem (you may have to write the file names down) and either click "Check in" or "Publish Selected".
Less frequently, files can become "inconsistent" because file permissions or corruptions can occur in particular files during site development or installation of the CMS. These problems cannot be fixed through the CMS, and you will need to contact the support staff to resolve them.
Replacing Text within Files
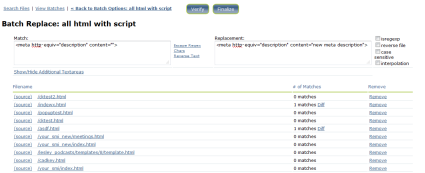
Now that you have a batch and a backup and you know the files are "consistent", it's time to perform the final replacement. Click "Replace Text" to begin. The screen (shown below) will appear. At the top of the page, the "Old" and "New" text boxes are where you place the old text (matched) with the new text (replace). You can do up to 10 replacements at once, by clicking the "more" button to reveal additional boxes.
The idea of this screen is simple. Paste in the text you want to match. Paste in the text you want to replace. (This can include HTML content, urls, or include files.) Click "Verify" to see how many pages have matches and how the replacement will affect your pages. Use the "Diff" button to see the differences your change will make (prior to actually making the changes.). Click "Finalize" to complete the changes.
A few notes:
- Only pages which actually have changes will be changed. In this way, you can use "Publish" to undo all changes made in that match.
- Matches are "whitespace" insensitive by default, that is a match will be found if you put in two spaces but your file only has one. We designed it this way because HTML doesn't care about spaces.
Things get more complicated when you start using options. Each replacement has options associated with it. These include "isregexp" (is regular expression), reverse file (reverse the file during matching, and then reverse it back), case sensitive (turn on case sensitivity), interpolation (replace back substitutions with $1, $2, $3 etc.) If you are unsure of how these work, read our article on the command line html search and replace tool.
We'll be rolling out this feature to our clients in the next few months. Once it's installed, you can modify title tags en-masse, update footers, or restructure your page entirely when you have static content. I hope you can make use of this feature. As always let us know if you are having problems with your installation.